In my last post, I wrote about writing a sparkly skill in Abbot. That was fun! But Abbot isn’t only about fun. After all, our company name is A Serious Business, Inc. Seriously, that’s the name. So it’s about time I show you how to get to some serious business with Abbot.
Here’s the scenario: We have a Blue Green deployment set up for the Abbot website. In Azure parlance, we use Deployment Slots to set this up. This allows us to deploy to stage, and have an automatic cutover to production if everything is fine. But this process can seem opaque in action. It’d be nice to receive a notification when a deployment to stage is complete and the swap is starting. That’s where the new Abbot cloud-event skill comes in handy.
I recorded a video so you can watch to see it in action. But I’ll write about it here too.

The cloud-event skill supports the Cloud Events Web Hooks for Event Delivery specification. That means it can support any cloud provider that implements the spec, which I assume is most of them.
In our case, we use Azure Event Grid to subscribe to events happening in our cloud infrastructure. Here’s how it works.
Create Azure Event Grid Subscription
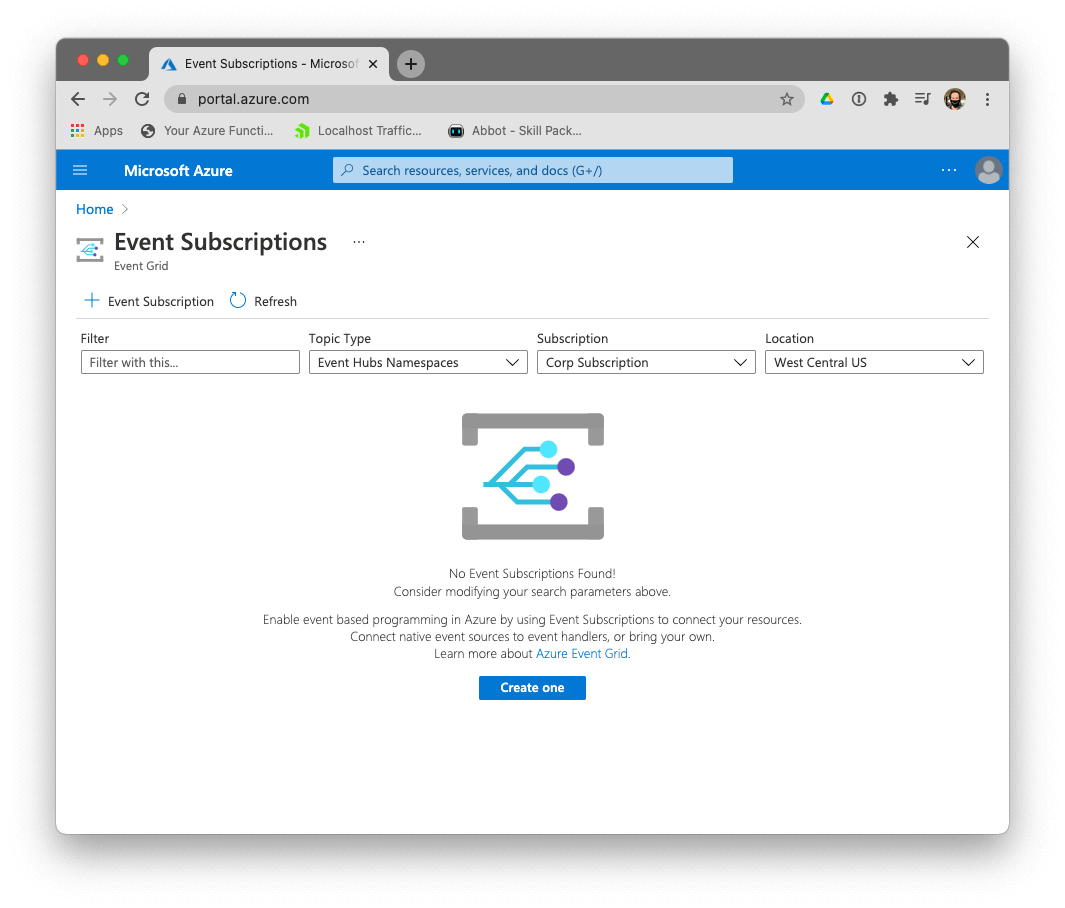
In the Azure Portal search up “Event Grid Subscriptions” and click on that to get to the event grid subscriptions page. Note, this page is pre-filtered which can be confusing (I let the team know and they promise to make this UI better).

From here click the plus sign next to “Event Subscription” to create a new subscription.
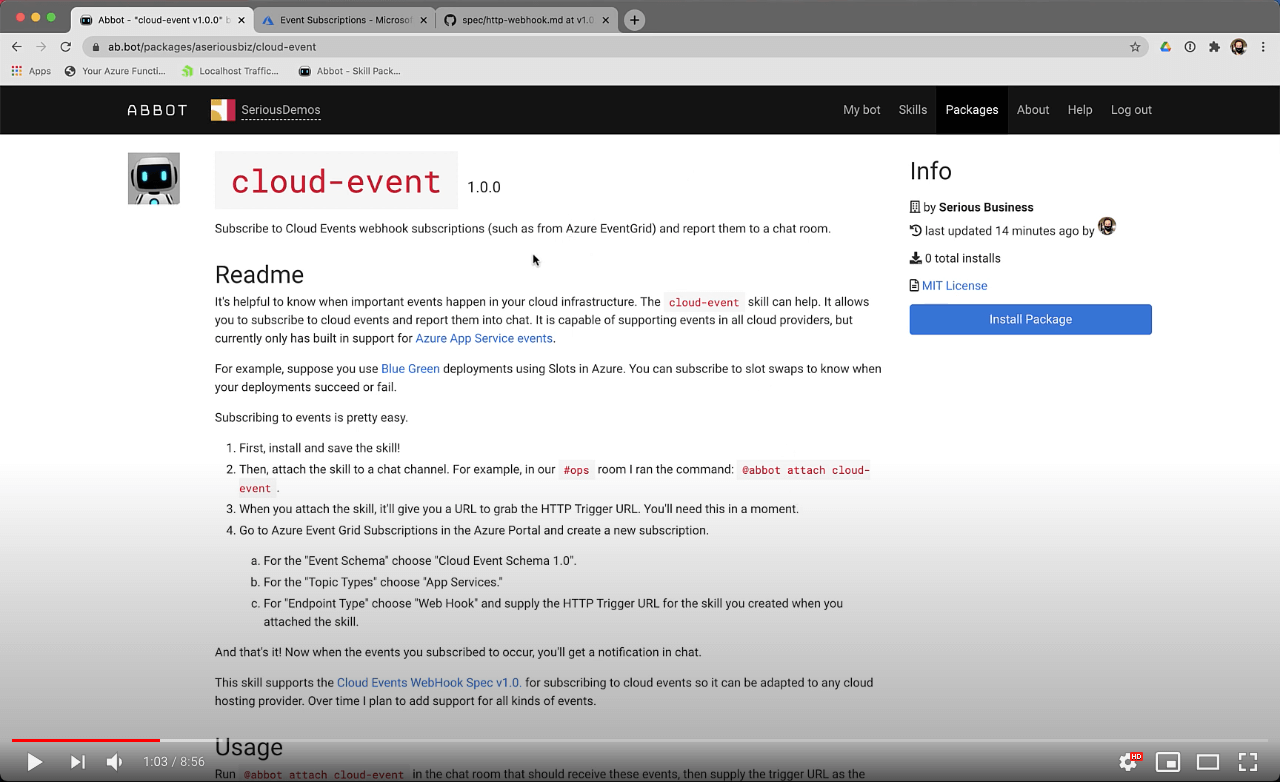
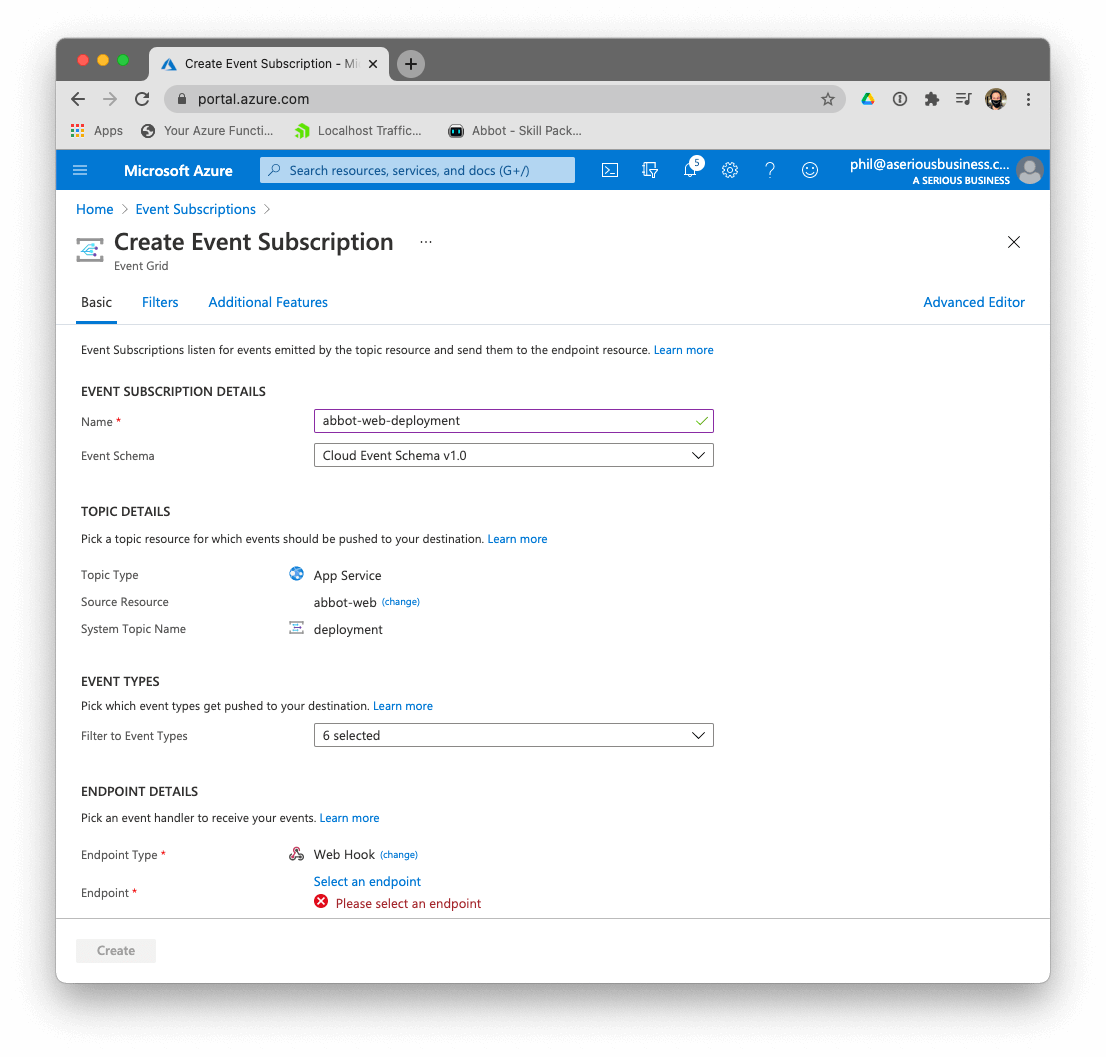
- For the “Event Schema” choose “Cloud Event Schema 1.0”.
- For the “Topic Types” choose “App Services.”
- For “Endpoint Type” choose “Web Hook”
At this point, it should look something like this. Now we just need a web hook URL. This is where Abbot comes in!

At this point, I assume you have an Abbot account set up and connected to a chat room. If not, go to / and click “Log In” and use your Slack or Discord login to log in. Follow the instructions to get it set up.
Next, we need to install the cloud-event package. On the cloud-event package page, click the “Install Package” button. It’ll give you a chance to review the code before it actually installs it. Click “Create skill from package” and now you have the skill enabled!
Go to a chat room with Abbot. In our case, we have an #ops room for this sort of notification. Then run the following in chat:
@abbot attach cloud-event
What that does is create an HTTP trigger for the skill attached to the room where you ran it. An HTTP trigger is a secret URL that can be used to call the skill. And the skill will respond to the room it’s attached to.
When you run the command, Abbot will respond with something like:
The skill cloud-event is now attached to the channel ops. Visit /skills/cloud-event/triggers to get the secret URL used to call this skill.
Grab that URL, and go back to the Event Grid Subscription page, and click “Select an endpoint” and supply the trigger URL as the web hook endpoint. Click “Create” and you’re done! You can trigger a deploy to see it in action. Or just change an App Setting to get an AppUpdated notification. If you run into any problems, you can see a log of the last 100 HTTP requests that the skill received.
@abbot cloud-event log
And you can inspect more details such as the HTTP headers and the request body by specifying which log entry to look at:
@abbot cloud-event log 42
This is a powerful example of the value of Abbot in a chat ops workflow. If you’re interested in learning more about Abbot, check out my introduction to Abbot, my .NET Rocks episode on Abbot, or just peruse the Abbot website. And when you watch the video, don’t forget to smash that like button!

.png)
.png)

.png)


